

Just a Mum's Cherry Chocolate Cake
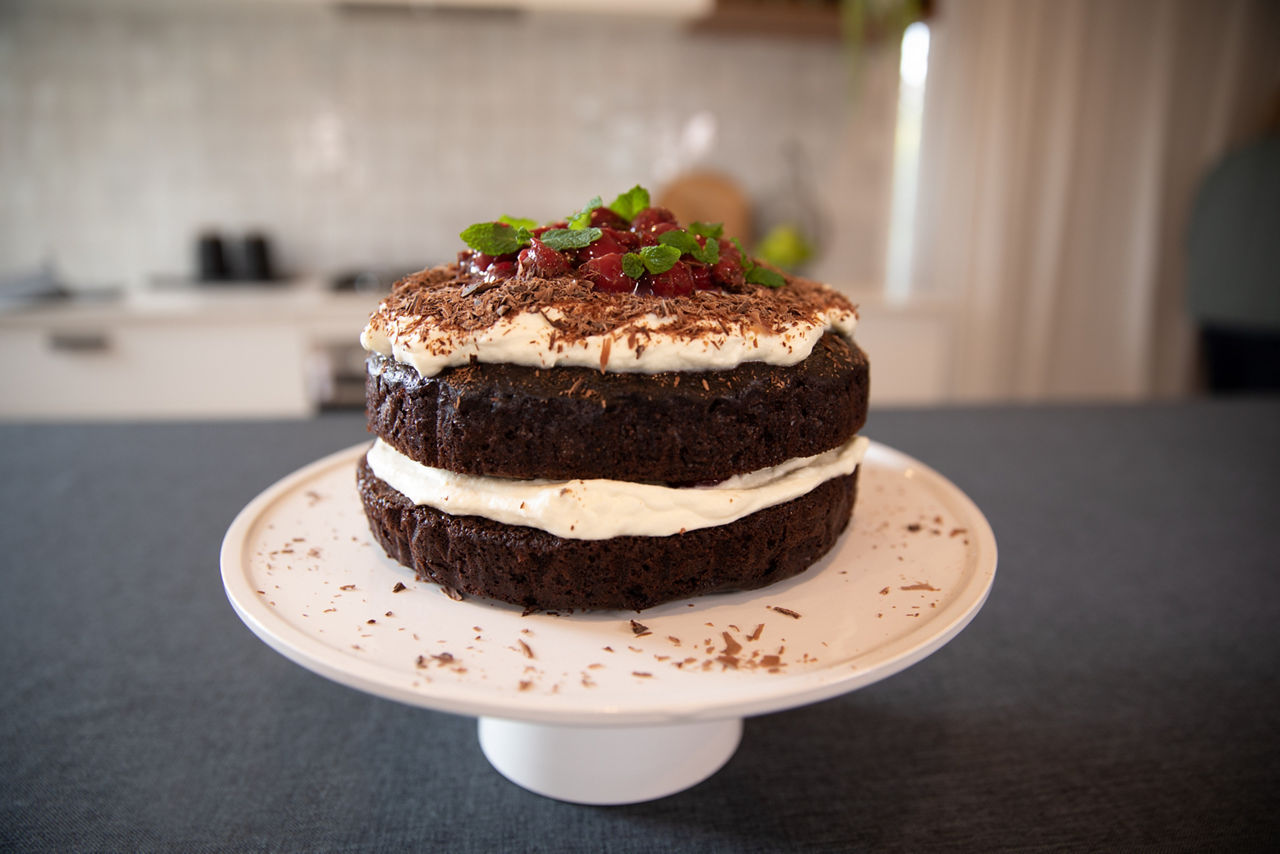
Anna from Just A Mum's Kitchen shares her simple, yet decadent, Cherry Chocolate Cake. This is the perfect Christmas Day dessert recipe as the chocolate sponge cakes and cherry filling can be pre-prepared and easily assembled just before serving.
Ingredients
- 1 cup black coffee
- 2 cups flour
- 2 teaspoons baking soda
- 1 teaspoons salt
- 1/2 cup cocoa
- 1 1/2 cups sugar
- 2 eggs
- 1/2 cup canola oil
- 1 tablespoons malt vinegar
- 1 cup milk
- 1 teaspoons vanilla essence
Cherry filling
- 1 tablespoons cornflour
- 1/2 cup caster sugar
- 1 tablespoons lemon juice
- 680 grams morello Cherries
Whipped cream
- 300 mL cream
- 2 tablespoons icing sugar
- 1 teaspoons vanilla essence
- 1 cup black coffee
- 2 cups flour
- 2 teaspoons baking soda
- 1 teaspoons salt
- 1/2 cup cocoa
- 1 1/2 cups sugar
- 2 eggs
- 1/2 cup canola oil
- 1 tablespoons malt vinegar
- 1 cup milk
- 1 teaspoons vanilla essence
Cherry filling
- 1 tablespoons cornflour
- 1/2 cup caster sugar
- 1 tablespoons lemon juice
- 680 grams morello Cherries
Whipped cream
- 300 mL cream
- 2 tablespoons icing sugar
- 1 teaspoons vanilla essence
- Step 1 of 16Preheat the oven to 180°C bake. Prepare two 20cm round baking tins with cooking spray & baking paper, covering the base and sides of the tins.
- Step 2 of 16In a large bowl sift together the flour, baking soda and salt, stir to combine. Then sift in the cocoa, add the sugar and mix together.
- Step 3 of 16In a medium bowl add the eggs, whisk gently, then add the oil, vinegar, milk, vanilla essence, and coffee and whisk together well.
- Step 4 of 16Make a well in the centre of the bowl of dry ingredients and pour in the wet ingredients. Combine well until no flour or lumps remain. Pour an even amount of mixture into each of the prepared baking tins.
- Step 5 of 16Bake for approximately 30-40 minutes or until a skewer comes out clean and cakes spring back to the touch. Allow cakes to cool in the pans for 15 minutes, then remove to cool completely on wire racks. Once cold, cake can be stored in the freezer for up to 3 months wrapped well in an airtight container.
- Step 6 of 16To prepare the cherry filling strain the cherries from the juice, reserving both the cherries and the juice in separate bowls. Set aside.
- Step 7 of 16In a small mixing bowl add ⅓ cup of the reserved cherry juice and cornflour. Mix well and set aside.
- Step 8 of 16In a medium saucepan add a further ½ cup of the cherry juice, the sugar and lemon juice and slowly simmer over medium heat until the sugar is dissolved. Scoop out 3 Tbsp of this mixture and set aside to use as a simple syrup for brushing on the cakes later.
- Step 9 of 16Add the cornflour mixture (mixing again before adding) to the saucepan and stir well. Add half the cherries and mash lightly to crush them. Then add the remainder of the cherries, uncrushed. Bring this mixture slowly to the boil, stirring often. Boil until the mixture thickens & coats the back of a wooden spoon. Remove from the heat.
- Step 10 of 16Allow to cool completely before using (can cool in the refrigerator if desired). Filling will keep in an airtight container in the refrigerator for up to 5 days.
- Step 11 of 16When the cake is ready to decorate, prepare the whipped cream and store in the fridge until time to apply. In a large, cold glass or metal bowl pour in the cream, icing sugar and vanilla essence.
- Step 12 of 16Using the whisk attachment of a food mixer or hand held beaters, whip the cream for 3-4 minutes until you achieve medium peaks. For the best result, check the mixture once it begins to thicken to the soft peak stage, and then whip in brief increments until medium peaks form. Medium peaks are when the whisk lifts off the cream and a peak forms and gently folds a little at the top.
- Step 13 of 16To assemble the cake, place one layer of cooled cake on a cake stand or serving plate. You may wish to thinly slice off the domed top to create a flat surface. Brush the cake with half the reserved syrup then spread with a thick layer of whipped cream, leaving 1 cm clear around the edge.
- Step 14 of 16Use a slotted spoon to add half of the cherries on top of the cream in a single layer, not quite to the edge of the cream.
- Step 15 of 16Gently place the second layer of cake on top of the first and brush with the cherry syrup. Spread with a generous layer of whipped cream. Add the remainder of the drained cherries in a pile in the middle of the cake.
- Step 16 of 16Grate dark chocolate into shards and decorate the outside edge of the cake to finish. You can pop some fresh mint leaves on the top for added colour. Allow to cool in the fridge before serving to allow the flavours to soak into the cake.
Method
- Step 1 of 16Preheat the oven to 180°C bake. Prepare two 20cm round baking tins with cooking spray & baking paper, covering the base and sides of the tins.
- Step 2 of 16In a large bowl sift together the flour, baking soda and salt, stir to combine. Then sift in the cocoa, add the sugar and mix together.
- Step 3 of 16In a medium bowl add the eggs, whisk gently, then add the oil, vinegar, milk, vanilla essence, and coffee and whisk together well.
- Step 4 of 16Make a well in the centre of the bowl of dry ingredients and pour in the wet ingredients. Combine well until no flour or lumps remain. Pour an even amount of mixture into each of the prepared baking tins.
- Step 5 of 16Bake for approximately 30-40 minutes or until a skewer comes out clean and cakes spring back to the touch. Allow cakes to cool in the pans for 15 minutes, then remove to cool completely on wire racks. Once cold, cake can be stored in the freezer for up to 3 months wrapped well in an airtight container.
- Step 6 of 16To prepare the cherry filling strain the cherries from the juice, reserving both the cherries and the juice in separate bowls. Set aside.
- Step 7 of 16In a small mixing bowl add ⅓ cup of the reserved cherry juice and cornflour. Mix well and set aside.
- Step 8 of 16In a medium saucepan add a further ½ cup of the cherry juice, the sugar and lemon juice and slowly simmer over medium heat until the sugar is dissolved. Scoop out 3 Tbsp of this mixture and set aside to use as a simple syrup for brushing on the cakes later.
- Step 9 of 16Add the cornflour mixture (mixing again before adding) to the saucepan and stir well. Add half the cherries and mash lightly to crush them. Then add the remainder of the cherries, uncrushed. Bring this mixture slowly to the boil, stirring often. Boil until the mixture thickens & coats the back of a wooden spoon. Remove from the heat.
- Step 10 of 16Allow to cool completely before using (can cool in the refrigerator if desired). Filling will keep in an airtight container in the refrigerator for up to 5 days.
- Step 11 of 16When the cake is ready to decorate, prepare the whipped cream and store in the fridge until time to apply. In a large, cold glass or metal bowl pour in the cream, icing sugar and vanilla essence.
- Step 12 of 16Using the whisk attachment of a food mixer or hand held beaters, whip the cream for 3-4 minutes until you achieve medium peaks. For the best result, check the mixture once it begins to thicken to the soft peak stage, and then whip in brief increments until medium peaks form. Medium peaks are when the whisk lifts off the cream and a peak forms and gently folds a little at the top.
- Step 13 of 16To assemble the cake, place one layer of cooled cake on a cake stand or serving plate. You may wish to thinly slice off the domed top to create a flat surface. Brush the cake with half the reserved syrup then spread with a thick layer of whipped cream, leaving 1 cm clear around the edge.
- Step 14 of 16Use a slotted spoon to add half of the cherries on top of the cream in a single layer, not quite to the edge of the cream.
- Step 15 of 16Gently place the second layer of cake on top of the first and brush with the cherry syrup. Spread with a generous layer of whipped cream. Add the remainder of the drained cherries in a pile in the middle of the cake.
- Step 16 of 16Grate dark chocolate into shards and decorate the outside edge of the cake to finish. You can pop some fresh mint leaves on the top for added colour. Allow to cool in the fridge before serving to allow the flavours to soak into the cake.
Nutrition per serving
1429 Kilojoules
Protein4 grams
Fat15 grams
Carbs47 grams
Sugars35 grams
Dietary and nutritional info supplied by NZ Nutrition Foundation
Method
- Step 1 of 16Preheat the oven to 180°C bake. Prepare two 20cm round baking tins with cooking spray & baking paper, covering the base and sides of the tins.
- Step 2 of 16In a large bowl sift together the flour, baking soda and salt, stir to combine. Then sift in the cocoa, add the sugar and mix together.
- Step 3 of 16In a medium bowl add the eggs, whisk gently, then add the oil, vinegar, milk, vanilla essence, and coffee and whisk together well.
- Step 4 of 16Make a well in the centre of the bowl of dry ingredients and pour in the wet ingredients. Combine well until no flour or lumps remain. Pour an even amount of mixture into each of the prepared baking tins.
- Step 5 of 16Bake for approximately 30-40 minutes or until a skewer comes out clean and cakes spring back to the touch. Allow cakes to cool in the pans for 15 minutes, then remove to cool completely on wire racks. Once cold, cake can be stored in the freezer for up to 3 months wrapped well in an airtight container.
- Step 6 of 16To prepare the cherry filling strain the cherries from the juice, reserving both the cherries and the juice in separate bowls. Set aside.
- Step 7 of 16In a small mixing bowl add ⅓ cup of the reserved cherry juice and cornflour. Mix well and set aside.
- Step 8 of 16In a medium saucepan add a further ½ cup of the cherry juice, the sugar and lemon juice and slowly simmer over medium heat until the sugar is dissolved. Scoop out 3 Tbsp of this mixture and set aside to use as a simple syrup for brushing on the cakes later.
- Step 9 of 16Add the cornflour mixture (mixing again before adding) to the saucepan and stir well. Add half the cherries and mash lightly to crush them. Then add the remainder of the cherries, uncrushed. Bring this mixture slowly to the boil, stirring often. Boil until the mixture thickens & coats the back of a wooden spoon. Remove from the heat.
- Step 10 of 16Allow to cool completely before using (can cool in the refrigerator if desired). Filling will keep in an airtight container in the refrigerator for up to 5 days.
- Step 11 of 16When the cake is ready to decorate, prepare the whipped cream and store in the fridge until time to apply. In a large, cold glass or metal bowl pour in the cream, icing sugar and vanilla essence.
- Step 12 of 16Using the whisk attachment of a food mixer or hand held beaters, whip the cream for 3-4 minutes until you achieve medium peaks. For the best result, check the mixture once it begins to thicken to the soft peak stage, and then whip in brief increments until medium peaks form. Medium peaks are when the whisk lifts off the cream and a peak forms and gently folds a little at the top.
- Step 13 of 16To assemble the cake, place one layer of cooled cake on a cake stand or serving plate. You may wish to thinly slice off the domed top to create a flat surface. Brush the cake with half the reserved syrup then spread with a thick layer of whipped cream, leaving 1 cm clear around the edge.
- Step 14 of 16Use a slotted spoon to add half of the cherries on top of the cream in a single layer, not quite to the edge of the cream.
- Step 15 of 16Gently place the second layer of cake on top of the first and brush with the cherry syrup. Spread with a generous layer of whipped cream. Add the remainder of the drained cherries in a pile in the middle of the cake.
- Step 16 of 16Grate dark chocolate into shards and decorate the outside edge of the cake to finish. You can pop some fresh mint leaves on the top for added colour. Allow to cool in the fridge before serving to allow the flavours to soak into the cake.